 Steps
Steps
- Click on the Administration Menu and select Scheduling.
- From the Scheduling Menu select Add/Drop.
- The Search window is displayed. This window allows you to select the student schedule to which you wish to add courses.
- In the Search By section click on the drop down arrow and search for the appropriate student or group of students. Click Get List to display the list of students.
- Once the students are displayed, double-click on the student name to open the schedule window.
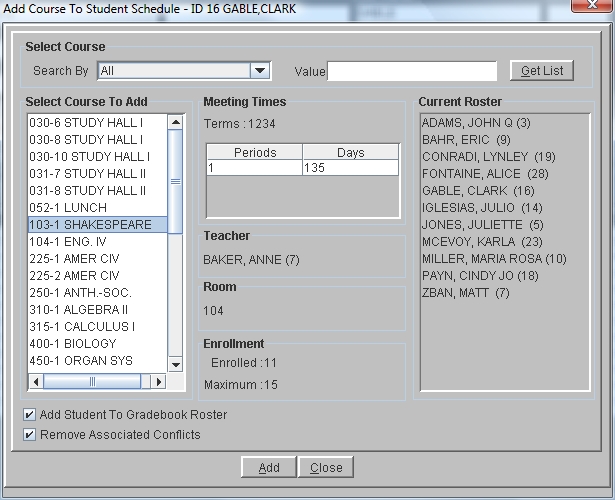
- Click the Add button to display the Add Course To Student Schedule window.
- Click in the Search By field to choose your search option. You can search by Course Number, Course Name, Department, All Courses or Period.
- If you have selected something other than All, you must enter information into the Value field to select your course. Then, click the Get List button to display the results of your search.
- If you are searching for a specific course number, you can display the sections of that course in the order that best fits the student schedule by clicking the Order By Best Fit check box.
- When the selected courses are displayed, courses that have check marks are currently part of the student schedule. Click the check boxes of the courses you wish to add and click the Add button to return to the student schedule.
- To scroll from student to student click the Next or Previous button.
- Click Close to exit the Student Schedule.
Note: Unchecking classes that were already in the student schedule does not remove them from the schedule.
