 Steps
Steps
- Click on the Administration Menu and select Attendance.
- Click on the Attendance Menu and select Quick - Daily.
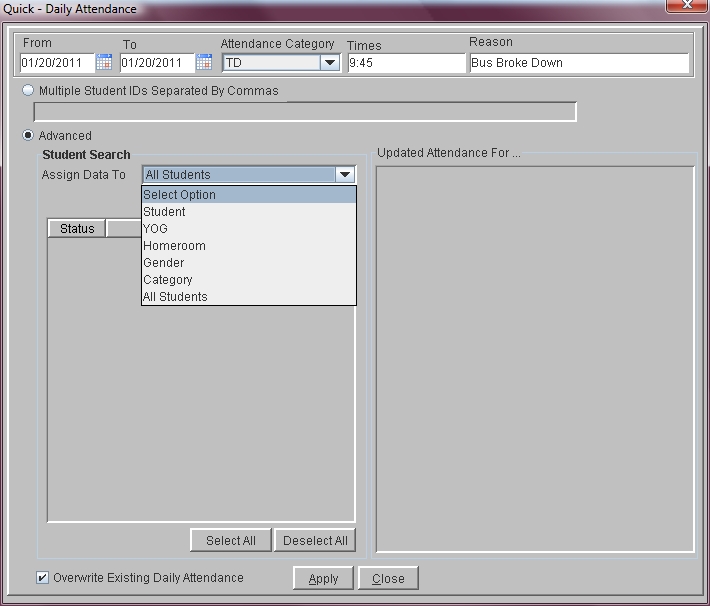
- The Date fields default to today's date. To change the date, click in the Date field and type the date for which you would like to update attendance in the form mm/dd/yyyy. You can also click on the button next to the Date field and select a date from the calendar.
- To update attendance for a single day make sure that both dates in the Date Range are the same.
- To update attendance for more than one day make sure that the dates in the Date Range section represent the dates required.
- Click in the Attendance Category field and select the appropriate Attendance Category from the drop down list.
- If you would like to associate a time with the selected category, click in the Time field and type the time of entry or dismissal or both. Times can be included on the Daily Attendance List.
- To enter a reason for the attendance category, click in the Reason field and type the information that should be printed on the Daily Attendance List.
- To enter daily attendance using Student IDs, click the button for Multiple Student IDs Separated by Commas, then click in the field and type the list of student IDs separated by commas ( i.e. 4, 27, 53, 22 ). Be sure there are no spaces at all in the line of IDs.
- To enter quick daily attendance using the advanced student search, click the Advanced button. In the Assign Data To section, select the appropriate option.
- Click Apply to update your attendance. Students that were selected are listed on there right after their attendance has been updated.
Note: Make sure you are selecting a date that is included in one or more of the school calendars set up in the Calendar window.
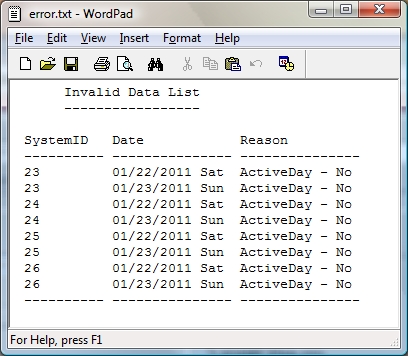
Note: If you have entered an invalid ID number the program warns you. Click OK to return to the screen and edit the ID number. If there are other errors the program updates the attendance and then displays an error list. See graphic below.

