 Steps
Steps
- Click on the Administration Menu and select Teacher Desk.
- If you are an administrator, click on the arrow in the Teacher field and select the appropriate teacher. If you are a teacher, your information will be displayed in the Teacher field and your courses will be listed.
- Click once on the course/section for which you are accessing a seating chart for.attendance The course will be highlighted.
- Click the Seating Information button on the left of the window to display a blank seating chart for this course/section. The names of students will appear on the left. The Config tab at the bottom will be in the forefront.
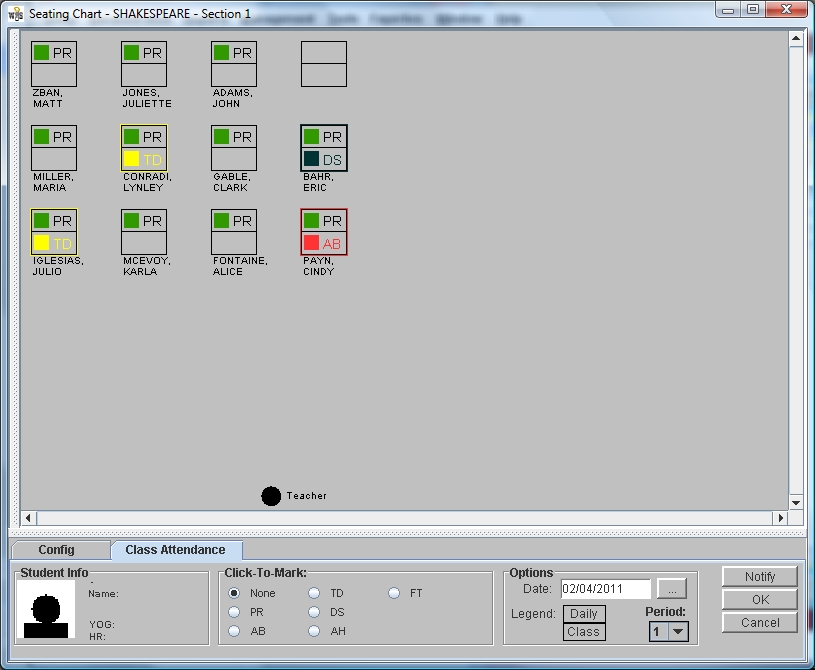
- Click the Class Attendance tab at the bottom of the screen. Students are considered present by default, unless they are absent for the day. Class and daily attendance displays for each student.
- Under Options on the lower right corner of the screen, ensure attendance is for today’s date.The period is read from the schedule. If the class is offered multiple periods, the user is prompted to select the correct one.
- To change class attendance value for a single student, right-click on the student, then select the appropriate value from the dropdown list.
- To set same class attendance value for multiple students, go to the Click-To-Mark section of the screen and click the value you would like to assign to multiple students. Next, single click on all students who should have that attendance value.
- If you use attendance notification, click Notify, then OK. You may also include a note with additional information for the administrator.
All student names listed on the course roster will display, including inactive students and those that are not enrolled in the course on the master schedule. Once seat assignments have been made, these students may be deleted from the seating chart. Deleting them from the seating chart does not delete them from the class roster.
You MUST make sure the date and period are set correctly.
