Add A Teacher Resource

Steps
- Click on the AdministrationMenu
and select Schedule Builder.
- From the Schedule Builder Menu
select TeacherResources.
The list of existing resources is displayed.
- Click the Add button at the
top of the window.
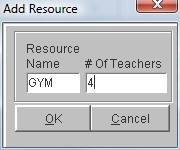
- Click in the Resource Name
field and type the name of the Teacher Resource (max. 4 characters).
- Click in the # Of Teachers
field and type the total number of teacher positions for this
resource. For example, if you have four Phys. Ed. teachers, you would
create a resource called Gym with 4 teacher positions.
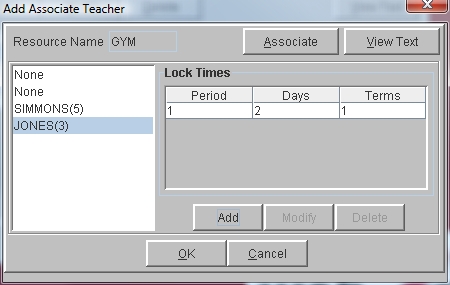
- Click OK to display the Add
Associate Teacher window. This window allows you to link positions
within a teacher resource to real teachers in your personnel
database. It also allows you to lock out certain periods for
teachers, blocking the master schedule from assigning them to a class
at that time.

- If you do not wish to associate teachers or enter Locked Times at
this time you can just click OK
and use Modify A Teacher Resource to edit those items later.
- To Associate Teachers: Click
on the Position on the left (says None) to which you wish to
associate a teacher. Click the associate button. When the Select
Teacher window is displayed, click Get List. Then, double-click on
the appropriate teacher. The associated teacher is displayed in the list.
- To Lock Out Meeting Times: Click
on the teacher or the position on the left for which you wish to
lock out times. Click on the blank line in the Lock Times section and
click Modify. Enter the
Period, Days and Terms that should be locked and click OK.
Click Add to add another
Locked Time.
- Click OK to save.
See Also
Teacher Resources
Modify A Teacher Resource
Delete A Teacher Resource